A practical starting guide for folders of letters, clippings, photographs, and documents kept in plastic sleeves. We are preparing to use this approach with a family collection from Chicago and will add a photographed example after testing the setup.
Old family binders rarely contain one kind of paper. A page may hold a newspaper clipping beside a letter, with a smaller photograph tucked behind both. The fastest useful method is to keep the camera in one place and move the material beneath it. Just as important, photograph the binder's arrangement before moving individual pieces: their order can be part of the history.
The setup we would start with
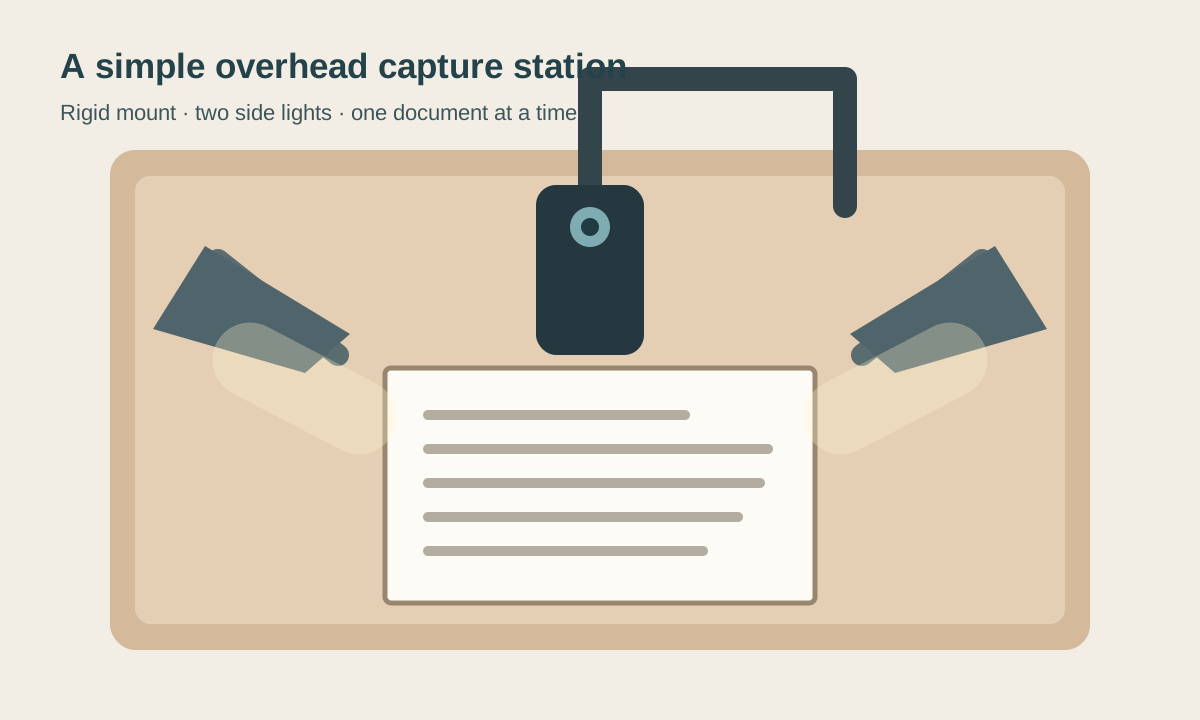
Place a phone on a rigid overhead mount so its main camera points straight down at a clear table. Put an adjustable lamp on each side, aimed across the page rather than into the camera. Use a remote shutter button or a short timer to avoid shaking the mount. A plain, matte sheet beneath the document makes the edges easy to see.
Our equipment research found two well-rated mount styles worth comparing: the Ailight adjustable desk-clamp overhead mount, which offers a longer horizontal reach, and the MoKo weighted-base overhead mount, which occupies no clamp space but has a shorter reach. For lighting, two matching Mainstays adjustable LED desk lamps are a low-complexity starting option. An Acuvar Bluetooth shutter remote is one example of a small remote; a built-in phone timer works too. These are research candidates, not equipment we have bought or tested. Check the reach over your entire open binder, phone-grip fit, stability, and current reviews before purchasing. The lamps must produce even light without bright reflections in the sleeves.
A flexible gooseneck may seem convenient, but test whether it settles quickly after each touch. A fixed copy stand or firm articulated arm makes repeated shots easier to keep square. The Smithsonian describes overhead copy stands for large or awkward items and used a fixed camera position to photograph fragile diaries efficiently. Smithsonian field-book guide; Smithsonian diary digitization.
A page-by-page workflow
- 1.Make a quick inventory. Number the binder and its sleeves in their existing order. Photograph the cover, labels, dividers, and each full open page before changing anything.
- 2.Capture every item separately. For a page with overlapping letters or clippings, the full-page image records the arrangement; individual images record the complete text. Photograph the reverse whenever it has writing, stamps, captions, or other marks. Return movable pieces to the same place before advancing.
- 3.Keep fragile pieces supported. If a brittle or torn original is already protected by a sleeve, photograph it through the sleeve and adjust the lights to remove glare. Do not pull it out merely for a cleaner image. The National Archives recommends leaving fragile records in protective sleeves for digitization. NARA paper-based records guide.
- 4.Check every small batch. After about 20 images, zoom in on the finest handwriting or newsprint, confirm that all four edges are present, and check that no lamp reflection hides text. Retake problems while that page is still in front of you.
- 5.Save and back up the originals. Keep the full-resolution camera files, with names such as `FrankBinder_001_03_front.jpg`. Make a second copy before rearranging the binder. A searchable PDF or transcript can be made later from those images; retain the original captures. NARA recommends descriptive names and a three-copy, two-media, one-off-site backup pattern. NARA family digitization guide.
Use the phone's main lens at its full photo resolution, with flash off. Keep the lens parallel to the page and leave a narrow border around the whole original. A document that fills most of the frame should have at least the detail of a 300-pixel-per-inch scan; faded handwriting, tiny type, or photographs can benefit from a closer second image. Archival guidance calls for 300–400 ppi for many textual records and at least 300 ppi for ordinary documents. NARA textual-image guidance; UK National Archives digitisation guidance.
When a different scanner makes sense
A flatbed can be useful for a single flat photograph or document that fits completely on the glass. A professional imaging service may be worthwhile for a very large or delicate collection, provided its handling, file quality, and return-of-originals process meet your needs. Do not put brittle, bent, or valuable originals through an automatic document feeder. The National Archives specifically warns that they can jam and tear. NARA family digitization guide.
The Chicago binder example is coming
Our first test will use a family binder of Chicago material that includes typed pages, old clippings, and documents in clear sleeves. We will publish a sample capture and what we learned once the equipment is in place and the family has chosen an item to share. For now, this guide gives a repeatable way to capture the whole collection while protecting the originals.
Research and preservation guidance: National Archives and Records Administration, UK National Archives, and Smithsonian Institution Archives, linked at the point of use above. Equipment examples were shortlisted from current customer-reviewed listings on October 1, 2026; no hands-on review or endorsement is implied.